Forgeline Tech: How to Remove and Install Forgeline Aluminum Center Caps
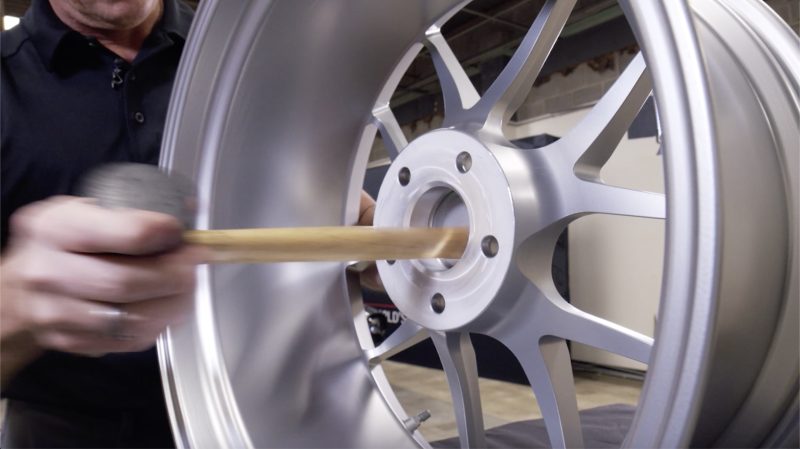
With no clips, fasteners, or visible external means of attachment, removing your Forgeline aluminum center caps can be a real mystery. So in this video below, Forgeline president Dave Schardt explains the ring/groove retention mechanism and demonstrates the proper method of removal and installation.
The following instructions apply to all Forgeline forged wheel aluminum center caps with the hidden ring/groove retention system (not applicable to the bolt-on Competition Cap). (Hint: The trick is the grease. Be sure to grease your rings, prior to installation!)
Understanding the Hidden Ring/Groove Retention System
The Forgeline hidden ring/grove system is designed to create an intentionally tight and secure center cap retention mechanism that will secure the cap to the wheel under most driving conditions without any additional fasteners or hardware that can add unwanted mass or be unsightly. It consists of a rubber ring that inserts into a groove that is machined into the outer circumference of the aluminum center cap and a matching groove that is machined into the inside edge of center bore of the wheel. When installed, the ring locks into both grooves, holding the center cap in place.
Center Cap Removal
- Set the wheel upright on a level surface.
- Place your free hand on the front side (logo side) of the center cap to catch it. Put a towel underneath, in case you drop it.
- Using a non-metallic tool with a soft rounded bottom, tap the back side of the cap with a firm strike, applying pressure from back to front.
- Continue to strike until the cap comes loose.
- Catch the loose cap in your free hand.
Center Cap Installation
- Set the wheel flat on its back, front side facing up.
- Insert the rubber retention ring into the matching groove machined into the outside circumference edge of the aluminum center cap.
- Important: Apply a thorough coat of grease all the way around the rubber retention ring.
- Line up the center cap over the front side of the center bore with the logo properly aligned (exact ideal position will vary according to wheel style).
- Keeping the center cap as flat and level as possible, use your body weight to apply an even distributed downward pressure across the entire face of the cap until it pops into place. (Take caution to avoid allowing the cap to tilt sideways under pressure. This may take several tries to get it right. Stay calm and carry on.)
- Wipe off any excess grease with a clean dry cloth.


